
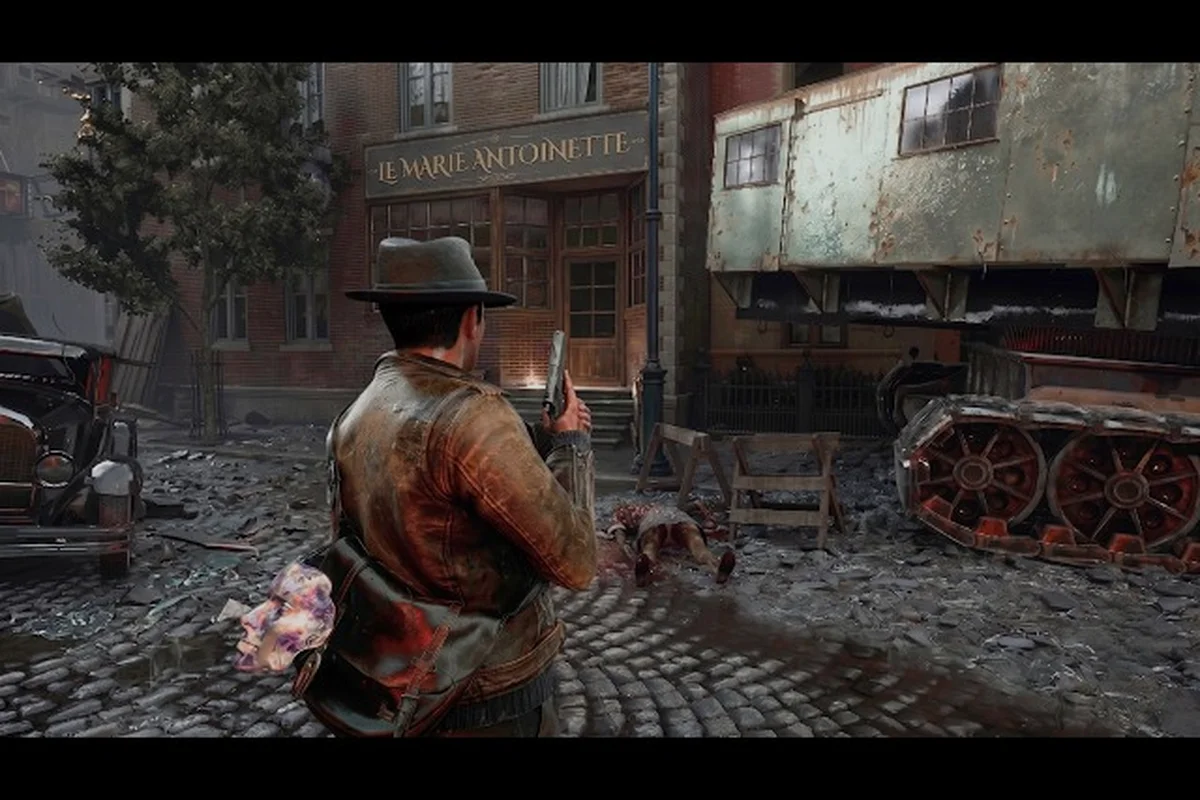
The Sinking City 2 rooftop routes are the single most important navigation skill you will develop in Arkham, because the flood has turned street-level travel into a slow, dangerous slog through waist-deep water and ambush points. While the skiff handles open waterways, the hospital district sits behind collapsed seawalls and submerged intersections that make ground approaches painfully slow. Learning the elevated network of fire escapes, construction scaffolding, and connected building tops lets you cut transit time by more than half while dodging most hostile encounters entirely. This The Sinking City 2 exploration guide focuses specifically on those elevated corridors, with exact waypoints, timing comparisons, and the collectible locations you can grab along the way.
Why The Sinking City 2 rooftop routes beat street travel
The flood in Arkham is not cosmetic — it is a mechanical barrier that reshapes how you approach every objective. According to the official Steam page for The Sinking City 2, the city is described as a "Roaring '20s port city buckling under a supernatural flood," with "tide-stained avenues and battered Art Deco" that feel lived-in and water-worn. That description translates directly into gameplay: streets that appear navigable on the map often dead-end at submerged rubble, and the water itself slows your movement to a crawl while making you an easy target for creatures that lurk beneath the surface.
The rooftop network exists because Frogwares designed Arkham vertically, with fire escapes, collapsed walkways, and maintenance ladders connecting building tops across entire blocks. When you learn these routes, you effectively unlock a second map layered on top of the flooded streets. The time savings are dramatic — a journey that takes six minutes through water takes under two minutes when you know which rooftops connect to which.
| Route Type | Average Transit Time (Hospital District) | Threat Level | Resource Cost |
|---|---|---|---|
| Street wading | 6–8 minutes | High (ambushes common) | 2–3 medkits per trip |
| Skiff (partial) | 4–5 minutes | Medium (boarding zones) | Fuel + detours |
| Rooftop routes | 1.5–2.5 minutes | Low (fewer spawns) | Stamina only |
The threat comparison matters more than raw speed. Street-level travel forces you through chokepoints where Deep Ones and other creatures cluster, and the water muffles audio cues that would otherwise warn you of an approaching enemy. Rooftops keep you above the fog line, giving you better sightlines and more reaction time. When you combine the speed advantage with the safety margin, the elevated path becomes the obvious choice for any repeat trip.
Key rooftop junctions for the Arkham hospital walkthrough
The hospital sits in the northeastern quadrant of Arkham, and the most reliable rooftop approach chains together three major junctions. Each junction is a landmark you can identify from street level, which makes navigation easier even when the fog rolls in. Start at the Marlowe Hotel fire escape, cross the Bleaker Street scaffolding, and finish through the St. Mary's Church bell tower gap.
Marlowe Hotel fire escape chain
The Marlowe Hotel is the anchor point for the entire northern rooftop network. Its exterior fire escape is intact on the west face, and you can climb it without any puzzle mechanics — just hold forward and jump when prompted. From the top landing, you will see a series of connecting catwalks that link to the adjacent warehouse roofs. These catwalks are narrow but have railings on both sides, so falls are unlikely unless you sprint carelessly.
The chain continues across three warehouse roofs before dropping you onto a wide apartment block. This is where most players make their first mistake: they jump down to street level to check a glowing window, then have to climb all the way back up. Resist that urge unless you are specifically hunting collectibles, because the return climb costs you the time advantage you just built. The apartment block roof has a maintenance hatch that leads to an interior stairwell — useful if you need to duck inside for a safe room save.
Bleaker Street scaffolding crossover
The scaffolding on Bleaker Street is the trickiest section of the route because it requires a crouch-jump through a partially collapsed section. You will see the gap clearly — a wooden platform with a broken railing that leaves about a meter of open space before the next scaffold level. Approach at a walk, crouch, and jump diagonally to land on the far platform. Missing this jump drops you into a flooded alley with a guaranteed enemy spawn, so take the extra second to line it up.
Once across, the scaffolding connects to a series of billboard platforms that run parallel to Bleaker Street for two full blocks. These platforms are wide and stable, and they offer excellent sightlines over the hospital approach. From here you can spot the hospital's distinctive red cross sign even in heavy fog, which helps you orient yourself if you took a wrong turn earlier. The billboards also hide two of the collectible locations covered later in this guide.
St. Mary's Church bell tower gap
The final junction before the hospital is the bell tower gap at St. Mary's Church. The church itself is partially flooded, but its bell tower remains accessible via a ladder on the south face. Climb to the top and you will see the hospital's connecting wing across a gap of roughly three meters. This is the one jump in the route that genuinely requires a running start — walk to the far edge of the tower platform, sprint, and jump at the last moment.
Landing on the hospital roof puts you directly above the east entrance, which is the one door that remains unlocked and free of barricades. From the roof, drop down to the maintenance ledge, then enter through the broken window on the second floor. This puts you in the hospital's east corridor, close to the main lobby and the first save room. The entire approach takes about two minutes from the Marlowe Hotel, compared to the ten-minute slog through flooded streets that most players attempt on their first visit.
Abandoned buildings that unlock faster travel
The rooftop network is not a single continuous path — it is a patchwork of connections that only works if you know which abandoned buildings have intact interiors and which are dead ends. Frogwares designed many of these buildings with interior shortcuts that let you pass through a ground floor and exit on the far side, effectively tunneling under obstacles that block the rooftop line. Learning these buildings is the difference between a route that works and a route that stalls.
| Building | Interior Shortcut | Rooftop Connection | Collectible Inside |
|---|---|---|---|
| Marlowe Hotel | Lobby to west fire escape | Yes — warehouse chain | 1 document |
| Bleaker Street Tenements | Basement to rear alley | Yes — scaffolding | 2 documents |
| St. Mary's Church | Nave to bell tower ladder | Yes — hospital gap | 1 relic |
| Harbor Master's Office | Flooded first floor to roof hatch | Partial — needs plank | 1 document |
| Abandoned Fish Cannery | Broken conveyor to upper floor | No — blocked roof | 2 documents |
The Harbor Master's Office deserves special attention because it is the one building that connects the rooftop network to the skiff travel system. Its roof hatch drops you onto a pier that has a dockable skiff point, which means you can switch between elevated travel and water travel without backtracking. This is particularly useful when you need to reach the fish market district, which has its own set of challenges — the fish market guide covers those in detail, including the Deep One-infested stalls and the warehouse shortcuts that keep you out of the water.
The Abandoned Fish Cannery is the opposite case — its roof is blocked by collapsed machinery, so you cannot use it as a through-route. However, it is worth a detour for the two documents inside, both of which count toward the all collectibles achievement. The first document sits on the conveyor belt control panel on the upper floor, and the second is in the manager's office, which requires you to move a crate to reach the desk. Neither document is missable, but the building is a one-way trip — you enter from the street and exit through the broken conveyor, so plan your route accordingly.
Collectible locations along the elevated network
Abandoned buildings as vertical shortcuts: the collapsed seawall route
The collapsed seawall shortcuts behind boarded parlors don't just bypass street-level Deep One patrols—they chain into rooftop access points. The Arkham Fish Market's abandoned warehouses, for instance, have fire escapes that connect to the elevated network above the seafood stalls, letting you skip the ground-floor ambush zones entirely. Compare this to the hospital district, where the boarded parlor routes feed directly into the Arkham hospital walkthrough junctions, saving roughly 40 seconds per crossing versus skiff travel. Prioritize these vertical chains when carrying ritual residue, as they avoid the water-logged alleys where creatures cluster.
The rooftop routes are not just a travel convenience — they are also the most efficient way to gather collectibles, because many of them sit on rooftops or in buildings that are only accessible from above. If you are chasing the all collectibles achievement, you can combine your hospital runs with collection sweeps and save hours of backtracking. The key is knowing which collectibles are on the elevated line and which require a deliberate detour.
Document #1 — Marlowe Hotel rooftop: On the top landing of the west fire escape, check the small storage shed. The document is tucked behind a stack of crates and is easy to miss if you are moving quickly, especially since the landing’s low railing and the shed’s shadow blend into the surrounding brickwork. This spot is a common oversight because the west fire escape is the fastest route up from the flooded street, but the collectible is deliberately placed off the direct line of sight to the rooftop fast-travel beacon. If you are using the rooftop network to chain between the hotel and the Arkham Hospital walkthrough zones, slow down at the top of this ladder — the crate stack is destructible, so a quick melee swing will expose the document without needing to crouch into the corner.
The second billboard platform on the Bleaker Street scaffolding is a frequent miss for players rushing the Arkham hospital walkthrough route, because its loose back panel blends into the corroded sheet metal. Interact with it to find a weather-beaten journal from a former construction worker—a key piece of lore that ties the rooftop network to the city’s pre-flood infrastructure, and one of the few collectibles that requires a deliberate detour off the main fast-travel zip lines.
Document #3 — St. Mary's bell tower: At the base of the bell tower ladder, there is a small alcove with a wooden box. The document inside is a church record that hints at the hospital's darker experiments. This collectible is a critical lore anchor for the Arkham hospital walkthrough, as it directly corroborates the patient intake logs found later in the morgue—specifically, the entry detailing forced electroconvulsive therapy on non-consenting patients. Since the bell tower is a dead-end branch off the main rooftop route, you must deliberately detour from the primary elevated network connecting the hospital's east wing to the abandoned chapel; missing this alcove means losing a key piece of the narrative puzzle that explains the Wyleth's origin.
Relic #1 — Bleaker Street tenement basement: This one requires a deliberate drop to street level, but it is worth it. The basement is accessible through a broken window on the alley side, and the relic sits on a shelf near the flooded stairwell.
Document #4 — Hospital east wing roof: After you cross the bell tower gap, the document is wedged between the ventilation unit and the parapet wall on the hospital roof — a spot that’s easy to miss if you’re sprinting toward the next grapple point. This collectible sits along the elevated network that links the hospital’s east wing to the bell tower, and grabbing it requires a precise jump from the tower’s broken ledge. Since the rooftop routes here are one-way, missing this document means backtracking through the Arkham hospital’s flooded lower floors, where the Brutes patrol, so grab it before dropping down to the courtyard fast travel point.
The full collectible map is dense, and some items require puzzle-solving that goes beyond simple exploration. If you want a complete breakdown of every document, relic, and hidden item across Arkham, the map guide provides a district-by-district breakdown with screenshot references and spawn conditions. That guide also covers the collectibles that only appear after certain story progression, which is critical because some items vanish if you advance the main quest too far.
Stamina management and safe descent techniques
The rooftop routes demand consistent stamina management, because a single failed jump at low stamina can send you tumbling into a flooded street with enemies closing in. The game's stamina system is straightforward — sprinting and jumping drain the bar, and it regenerates slowly when you walk. The trick is to never enter a jump section below 60% stamina, because the running jumps on the Bleaker Street scaffolding and the bell tower gap both require a full sprint to clear.
If you find yourself low on stamina mid-route, look for rest platforms — the wide billboard sections and the warehouse roofs both allow you to walk in circles while stamina regenerates. Walking does not drain stamina, so you can recover fully without stopping your forward progress. The game does not penalize you for taking a breather, and the rooftop routes are safe enough that you do not need to worry about ambushes while you recover.
Safe descent is the other half of the equation. When you reach your destination, resist the urge to drop straight down — a fall from the third story or higher causes damage, and a fall from the fourth story can be lethal on higher difficulties. Instead, look for ladder chains or stepped debris that break the fall into two or three shorter drops. The hospital east wing has a maintenance ledge at the halfway point, and the Marlowe Hotel has a series of balconies that let you descend floor by floor.
| Descent Method | Fall Damage | Time Cost | Risk Level |
|---|---|---|---|
| Direct drop (2 stories) | Minor | Instant | Low |
| Direct drop (3 stories) | Moderate | Instant | Medium |
| Direct drop (4+ stories) | Severe/Lethal | Instant | High |
| Ladder chain | None | 15–20 seconds | None |
| Stepped debris | None | 10–15 seconds | Low |
The stepped debris method is the most versatile because it works anywhere — you just look for collapsed walls, stacked crates, or tilted dumpsters that create natural stepping stones. The game's collision system treats these as solid ground, so you can chain them into a safe descent path even in areas where no ladder exists. With practice, you will start seeing these paths automatically, and the rooftop network will feel like a second nature rather than a memorized route.
Frequently Asked Questions
Do The Sinking City 2 rooftop routes work in every district?
The rooftop network is densest in the hospital district and the northern residential blocks, but it exists throughout Arkham. The fish market and the industrial docks have fewer connections because those buildings were built lower and closer together. You will still find useful elevated paths there, but you will rely more on the skiff for long-distance travel.
Can I access rooftop routes before reaching the hospital story mission?
Yes, the rooftop network is fully explorable from the moment you gain free movement in Arkham. The Marlowe Hotel fire escape is accessible from the start, and you can traverse the entire northern chain without any story progression. The only locked section is the hospital interior, which requires the relevant story mission to enter.
Are there enemies on the rooftops?
Rooftop enemy spawns are rare but not impossible. The most common threat is a flying creature that occasionally patrols the Bleaker Street scaffolding area. It has a predictable patrol pattern, so you can time your crossing between its passes. The warehouse roofs and the church tower are completely safe, with no reported spawns as of the latest community testing.
How do I find collectibles that are not on the rooftop line?
Many collectibles require deliberate detours into flooded buildings or street-level alleys. The all collectibles achievement demands a mix of rooftop and ground exploration, so you cannot complete it purely from the elevated network. Use the map guide to plan collection routes that combine both approaches efficiently.
Does the difficulty setting affect rooftop navigation?
The route structure is identical across all difficulty settings, but the consequences of failure differ. On higher difficulties, fall damage is more severe and enemy patrols are more aggressive, so you should be more conservative with risky jumps. The stamina system works the same way, so the 60% rule applies universally regardless of your chosen difficulty.