
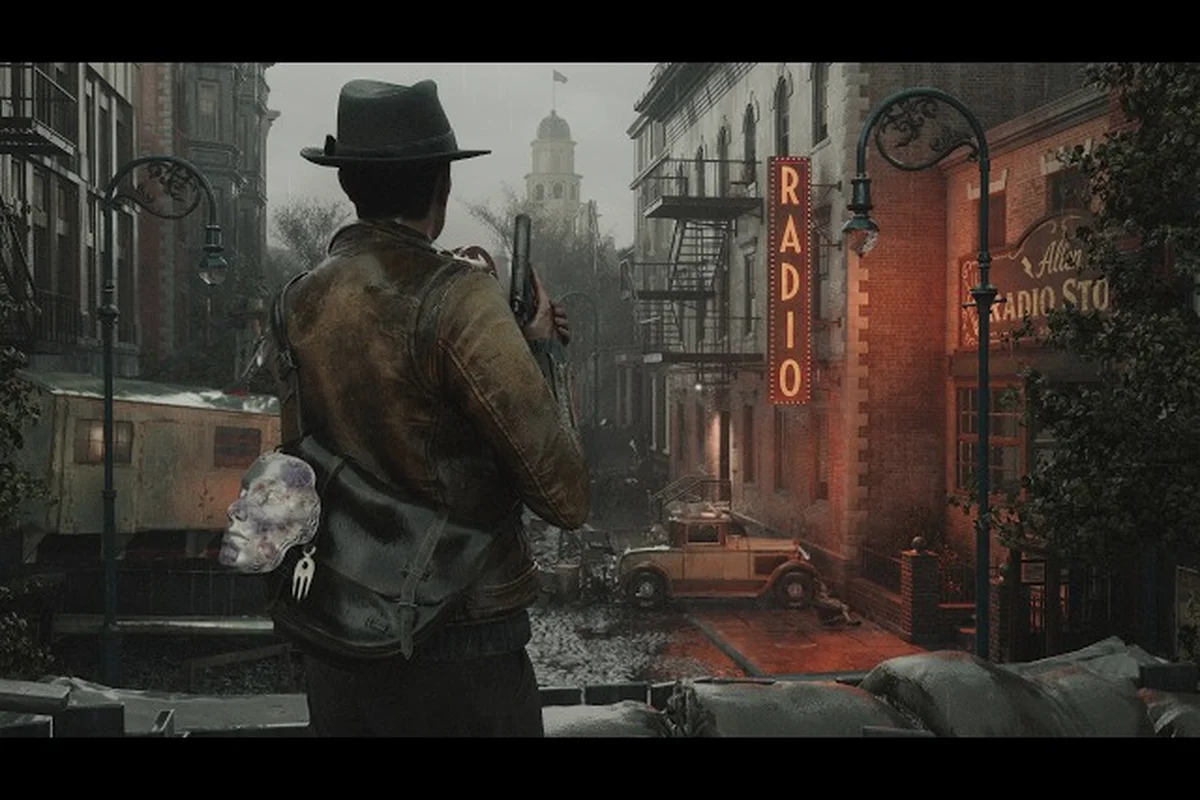
Arkham is drowning, and the difference between surviving and becoming another tide-stained corpse often comes down to knowing where you're going before the water rises again. This The Sinking City 2 map guide breaks down every major district, the safest foot routes, and the skiff paths that keep you out of Deep One territory. Because the city shifts with each flood cycle, understanding the layout isn't just helpful—it's the difference between a clean escape and a desperate swim through contaminated water.
The 1920s port city of Arkham, as detailed on the official Steam page, has been transformed by a supernatural flood that turned familiar streets into a labyrinth of half-submerged buildings and treacherous canals. Unlike the previous game's Oakmont, Arkham's districts feel lived-in and water-worn, with routes by foot and skiff, shortcuts behind collapsed seawalls, and secrets tucked in boarded parlors. You'll navigate a hospital where science hides its face, a fish market where the merchandise bites back, and descend deep below the city where eldritch horrors stir. This locations guide gives you the lay of the land so you can focus on the investigation rather than constantly checking your bearings.
Understanding the Arkham Map Layout
Skiff Navigation Through the Collapsed Seawall Shortcuts
The flooded lowlands between the Fish Market and Downtown Arkham hide a network of shortcuts behind collapsed seawalls, accessible only by skiff. Rather than circling the long way through open water where Deep Ones patrol, you can thread your skiff through these breaches to cut travel time by roughly 40%. The most reliable breach sits just northeast of the Fish Market's abandoned warehouses, marked by a tilted Art Deco signpost. Note that the seawall passages are one-way during low tide cycles, so plan your return route before committing to a shortcut.
The Arkham map in The Sinking City 2 isn't a single open expanse—it's a series of interconnected districts, each with its own character, elevation, and flood patterns. The city was built on a river delta, which means the eastern districts sit lower and flood first, while the western hills remain accessible longer during each tide cycle. This verticality matters more than most players expect, because the difference of a few feet in elevation can mean the difference between a walkable street and a submerged death trap.
When you first arrive, the map appears overwhelming, but it breaks down into five primary zones that you'll cycle through during the main investigation. Each district has a primary hub—usually a dry building with a safe room—and several secondary landmarks that serve as mission objectives or resource caches. The key to navigating efficiently is learning which routes connect which hubs, because the direct path is rarely the safest one.
| District | Elevation | Flood Risk | Primary Hub | Key Threat |
|---|---|---|---|---|
| Arkham Hospital | High | Low | Main Lobby | Shadows |
| Fish Market | Low | Severe | Warehouse Office | Deep Ones |
| Downtown | Medium | Moderate | Police Station | The Slither |
| University Hill | High | Low | Library | Cultists |
| Docks & Harbor | Lowest | Extreme | Crane Platform | Mixed |
The flood cycle operates on a roughly twenty-minute timer, though community reports suggest it can vary by difficulty setting. When the water rises, lower districts become impassable on foot, forcing you to either wait it out or use a skiff. This creates a natural pacing mechanic that pushes you toward the higher ground of University Hill or the Hospital during peak flood times. Understanding this rhythm is essential for planning your exploration routes, especially when you're hunting for collectibles or side objectives that sit in flood-prone areas.
Hospital District: The Safe Starting Ground
The Arkham Hospital serves as your introduction to the city, and it's the most forgiving district on the map for new players. The building itself is massive—four floors plus a basement that connects to the city's sewer system—and it functions as a vertical hub that keeps you dry even during the worst floods. The hospital's main lobby has a safe room with a save point and storage chest, making it your de facto home base for the first several hours.
Navigating the hospital requires understanding its three distinct wings. The East Wing contains patient rooms and the morgue, and it's where you'll find most of the hospital's narrative content. The West Wing houses the administrative offices and the pharmacy, which is a critical resource location for medical supplies. The South Wing connects to the emergency entrance and the ambulance bay, which opens onto the flooded street below. Each wing has its own hazards, but the Shadows that patrol the corridors are the primary threat you'll face here.
For a complete breakdown of the hospital's interior, including every room and the optimal path through the main story mission, check our detailed Arkham hospital walkthrough that covers the rooftop access points and vertical routes. The hospital's roof is actually one of the best traversal options in the early game, because it connects to several adjacent buildings via collapsed scaffolding and fire escapes.
Key Hospital Locations
The hospital contains several locations that you'll return to throughout the game, so memorizing their positions saves you significant backtracking time. The Pharmacy on the second floor of the West Wing holds a guaranteed medical kit respawn every flood cycle, making it a reliable farming spot. The Morgue in the basement connects to the sewer system, which is the fastest route to the Fish Market when the streets are flooded. The Rooftop Helipad is accessible via the East Wing stairwell, and it provides a safe vantage point for surveying the surrounding districts.
| Hospital Location | Floor | Purpose | Respawn Timer |
|---|---|---|---|
| Main Lobby Safe Room | Ground | Save point, storage | Always active |
| Pharmacy | 2nd West | Medical supplies | Every flood cycle |
| Morgue | Basement | Sewer access, story item | Story-locked |
| Rooftop Helipad | 4th | Vantage point, sniper position | Always active |
| Operating Theater | 3rd East | Story mission, key item | Story-locked |
The hospital's basement sewer access is particularly valuable because it lets you bypass the flooded streets entirely. The sewer tunnels are dark and cramped, and the Slither patrols these corridors, but the route cuts the travel time to the Fish Market in half compared to the surface path. If you're struggling with the creatures down there, our enemies guide explains their attack patterns and the best ways to deal with them without wasting ammunition.
Fish Market and the Flooded Lowlands
The Fish Market sits in the lowest part of Arkham, and it's the district that suffers the most from the flood cycle. When the water recedes, the market's stalls and warehouses become walkable, but the moment the tide rises, everything below the second floor goes underwater. This district is where the game's skiff navigation becomes essential, because the canals between the market stalls are the only reliable routes during high tide.
According to the extended gameplay trailer released on the Steam news page, the Fish Market was "a former hub of enterprise and trade, now taken over by Deep Ones from the ocean and other creatures." The seafood stalls, warehouses, and fishing equipment all sit abandoned, and the only sane person still living there is barely even human anymore. This description matches what players have reported from the demo—the Fish Market is the most combat-heavy district in the early game, with Deep Ones surfacing from the canals and attacking in groups.
The district's layout centers on a main canal that runs from the harbor to the market square. Along this canal, you'll find several key locations: the Warehouse Office serves as the district's safe room, the Cold Storage building contains valuable loot but requires a key to access, and the Drying Racks area is a common ambush point where Deep Ones emerge from the water. Learning the skiff routes through this district is essential, because the water level changes which buildings are accessible.
For a deeper dive into the Fish Market's specific layout and the best skiff paths through the flooded stalls, our Fish Market guide covers every building and the optimal routes for both foot and boat travel. The district connects to the Docks via a collapsed seawall shortcut that only appears during low tide, which is a critical piece of knowledge for anyone trying to reach the harbor district quickly.
Skiff Navigation Tips
The skiff is your primary transportation in the flooded lowlands, and mastering it requires understanding how the boat handles in different water conditions. The skiff has a forward thrust that's fast but noisy, attracting nearby enemies, and a silent drift mode that lets you move without alerting anything. The trade-off is speed versus stealth, and the right choice depends on whether you're trying to escape or sneak past a patrol.
-
Low tide: The canals are shallow, and you can see the bottom. Enemies are less likely to be in the water, but the exposed mud flats make you an easier target from shore.
-
Mid tide: The water level is ideal for skiff travel, and most canal routes are clear. This is the best time to cross the district, because you can see hazards from a distance.
-
High tide: The canals become deep and fast-moving, and Deep Ones are most active. Stick to the main canal and avoid the narrow side channels where ambushes are common.
The Casting Distance of the skiff's grappling hook determines which buildings you can reach from the water. You can upgrade this at the Warehouse Office workbench, and it's worth prioritizing because it opens up rooftop access in the flooded districts. The hook can also pull you onto ledges that are just above the waterline, which is often the only way to reach certain loot caches during high tide.
Downtown Arkham and the Vertical Routes
Downtown Arkham sits at medium elevation, which means it's walkable during most of the flood cycle but becomes partially submerged during the highest tides. This district is the largest on the map, and it contains the most side content, including the police station, several speakeasies, and the courthouse. The streets here are wider than in the Fish Market, but they're also more exposed, which makes you an easier target for ranged enemies.
The key to navigating Downtown is understanding its vertical routes. Many of the buildings have rooftop connections that let you bypass the street level entirely, avoiding both enemies and floodwater. The fire escapes, scaffolding, and collapsed buildings create a network of elevated paths that connect the major landmarks. This is where the game's parkour elements shine, and players who master the rooftop routes can cross the entire district without touching the ground.
The Police Station serves as the district's safe room, and it contains a workbench for upgrading your equipment. The Courthouse is a major story location, and it's surrounded by a flooded plaza that requires either a skiff or a rooftop approach to reach safely. The Speakeasy district is tucked between the main streets, and it's easy to miss if you're not looking for the hidden entrances—several bars have secret doors that lead to underground rooms.
The Downtown district also contains several abandoned buildings that are worth exploring for loot and lore. These buildings are marked on the map with a special icon, but they're often locked or require puzzle-solving to enter. The rewards are worth the effort, though—these locations contain some of the best weapons and upgrades in the game. For a complete list of these buildings and the collectibles inside them, check our exploration guide that covers all the hidden areas across Arkham.
Rooftop Route Network
The rooftop routes in Downtown form a connected network that's separate from the street-level map. Once you learn the connections, you can move between the Police Station, Courthouse, and Speakeasy district without descending to street level. This is particularly valuable during high tide when the streets are flooded and enemy patrols are denser.
| Route Segment | Starting Point | Ending Point | Difficulty | Hazards |
|---|---|---|---|---|
| Fire Escape Chain | Police Station | Courthouse | Easy | None |
| Scaffolding Bridge | Courthouse | Speakeasy | Medium | Collapse risk |
| Billboard Path | Speakeasy | Fish Market | Hard | Gap jumps |
| Crane Crossing | Fish Market | Docks | Hard | Enemy patrols |
| Rooftop Garden | University Hill | Downtown | Medium | Cultist snipers |
The Crane Crossing is the most dangerous rooftop route because it requires jumping between crane arms over a flooded street, and the cranes are patrolled by cultist snipers. However, it's also the fastest way to reach the Docks from the Fish Market without taking a skiff. If you're confident in your jumping and want to avoid the water, this route is worth learning, but it's not recommended for players who are still getting comfortable with the movement system.
University Hill and the High Ground
University Hill is the highest district in Arkham, and it's the only area that remains completely dry during all flood cycles. This makes it a natural safe haven, but it comes with its own threats—the cultists who control the district are hostile to outsiders, and they've set up patrols and checkpoints throughout the streets. The district contains the Miskatonic University Library, which is a major story location and the repository of much of the game's lore.
The University's campus is divided into several sections: the Library, the Science Hall, the Dormitories, and the Chapel. Each building has its own layout and hazards, but the Library is the most important because it contains the game's fast travel system. Once you unlock the Library's Leyline Beacon, you can teleport between the major districts, which dramatically reduces travel time in the late game.
The Chapel is a dangerous location that's tied to a late-game story mission. The cultists have fortified the building, and the interior is filled with traps and ambushes. The Science Hall contains a laboratory that's been converted into a cultist stronghold, and it's the source of several side quests that involve retrieving stolen research materials.
The district's high elevation also provides excellent vantage points for surveying the rest of the city. From the Library's observation deck, you can see the entire Arkham map, which is useful for planning your routes before you descend into the lower districts. The Observatory on the University's roof has a telescope that reveals hidden locations when you use it, marking them on your map for future exploration.
Frequently Asked Questions
What is the best route from the Hospital to the Fish Market?
The fastest route is through the Hospital's basement sewer system, which connects directly to the Fish Market's Warehouse Office. This path avoids the flooded streets entirely, but you'll need to deal with Slither patrols in the tunnels. Alternatively, you can take the rooftop route across Downtown and descend via the Crane Crossing, which is safer but requires more parkour skill.
How do I unlock fast travel in The Sinking City 2?
Fast travel unlocks after you activate the Leyline Beacon at the Miskatonic University Library on University Hill. This is part of the main story, and you'll reach it roughly halfway through the game. Once activated, you can teleport between the Library and other major district beacons, but you'll need to discover and activate each beacon before you can use it.
When is the best time to explore the Fish Market?
The best time to explore the Fish Market is during low tide, when the streets are walkable and Deep Ones are less active in the shallows. The water level shifts on a roughly twenty-minute cycle, so time your run around the flood timer. If caught by high tide, retreat to the Warehouse Office safe room and wait it out.
Are there any hidden areas on the Arkham map?
Yes, several hidden areas are scattered across the districts. The most notable include the Speakeasy underground rooms in Downtown, the Cold Storage building in the Fish Market, and the Observatory on University Hill. These locations are marked on your map only after you discover them, and they contain valuable loot and lore items that you won't find elsewhere.
What should I prioritize upgrading for better map traversal?
The skiff's grappling hook upgrade is the top priority—it extends casting distance and unlocks rooftop access in Downtown Arkham's vertical routes. Pair it with the stamina upgrade for parkour across University Hill, then the oxygen upgrade for diving in the Fish Market's flooded lowlands. Spend resources on these before combat upgrades.