
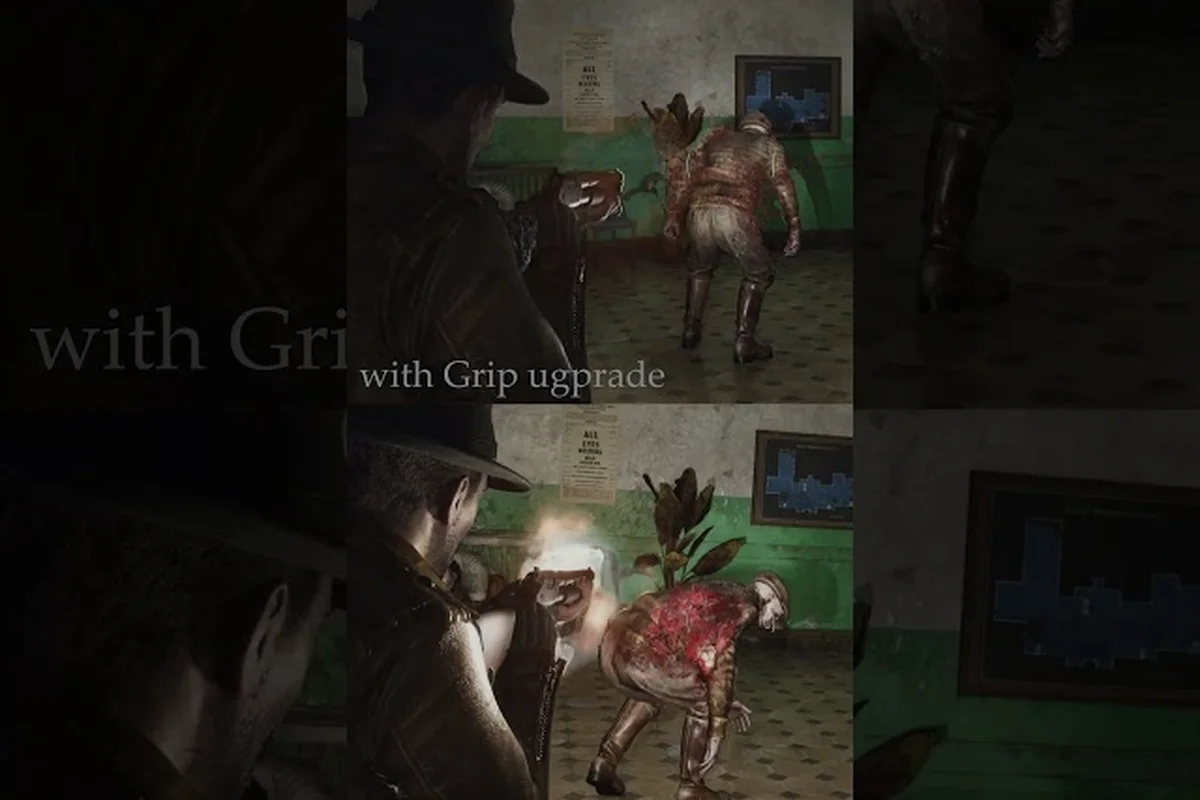
The Sinking City 2 weapon attachments system is the difference between scraping through Arkham's flooded streets and dominating them. While the base firearms in the Chthonic Arsenal perform adequately, attaching the right modifications transforms each gun into a specialized tool for specific combat scenarios. Understanding how this system works, which attachments exist, and where to find them will save you precious resources and ammunition throughout the campaign.
This guide breaks down every attachment currently available, explains how the modification system functions, and details the exact steps for securing the powerful Bucking Bronco revolver from the Holloway Manor side quest. You will also learn which attachments pair best with each weapon type and how to prioritize your upgrade path when resources run thin.
The Attachment System: How Mods Change Your Firearms
The modification system in The Sinking City 2 operates through dedicated workbench stations scattered across Arkham's safe houses. Unlike the base weapon upgrade path that improves raw stats, attachments alter handling characteristics, magazine capacity, and damage output in more dramatic ways. Each firearm in the Chthonic Arsenal accepts two attachment slots, though the exact combinations vary by weapon model.
According to the official Steam store page for The Sinking City 2, the Chthonic Arsenal pre-order weapons each come with unique looks and features that distinguish them from standard variants. What the store page does not fully explain is how attachments interact with these pre-order guns specifically. Community testing suggests that attachments apply differently to the Chthonic Arsenal versions compared to their standard counterparts, with some mods providing enhanced effects on the pre-order models.
Attachment Categories and Effects
The current attachment pool falls into several distinct categories, each serving a different tactical purpose: Muzzle, Barrel, Optics, and Underbarrel slots. For instance, equipping a compensator on the Bucking Bronco revolver tightens its recoil bloom enough to land follow-up shots on a Deep One’s head at 15 meters, whereas a suppressor on the Shale Mary handgun trades 15% damage for stealth, letting you clear a cultist camp without triggering the alarm that summons a Brute. The Breakwater shotgun benefits most from a choke, which tightens its pellet spread by roughly 30%, converting it from a panic button into a mid-range finisher. Meanwhile, the Tektite Tommy SMG gains more from a vertical foregrip than a laser sight, since its hip-fire penalty at 20 meters outweighs the minor ADS bonus. Understanding these trade-offs is key to optimizing your Chthonic Arsenal loadout—especially when hunting for how to get the revolver early, where the right attachment can compensate for its slow reload speed.
-
Barrel modifications — These alter damage falloff, recoil control, and muzzle velocity. The Kane's Hefty Barrel is the standout example, providing substantial damage boosts at the cost of handling.
-
Grip attachments — These improve stability, reduce spread, and enhance aiming precision. Kane's Wrapped Grip exemplifies this category with its balanced stat profile.
-
Magazine upgrades — These increase ammo capacity and reload speed, though they often add weight that affects movement speed.
-
Optics and sights — These enhance target acquisition at range, with some offering magnification for precision shots.
The attachment system rewards experimentation because each gun responds differently to the same modification. A barrel that makes the Shale Mary handgun feel snappy might make the Breakwater shotgun unwieldy, which is why understanding each weapon's base characteristics matters before committing resources.
How Attachments Interact with Weapon Stats
Every attachment modifies the weapon's hidden stat blocks rather than the visible damage number. This means two players with the same shotgun can have dramatically different effective performance based on their attachment choices. The handling stat governs how quickly you can bring the weapon to bear, while stability determines how much the crosshair blooms during sustained fire.
| Attachment Type | Primary Stat Affected | Secondary Stat Affected | Best Paired With |
|---|---|---|---|
| Barrel Mods | Damage | Range | Shotguns, Revolvers |
| Grip Mods | Stability | Handling | SMGs, Handguns |
| Magazine Upgrades | Ammo Capacity | Reload Speed | Any weapon |
| Optics | Accuracy | Aim Speed | Handguns, SMGs |
Resource management becomes critical because attachments require weapon parts to install, and these components are scarce during the early campaign. You will need to choose which guns to prioritize, especially when the weapon upgrade guide explains how the same parts feed into the base upgrade path.
Chthonic Arsenal Breakdown: Shale Mary, Breakwater, and Tektite Tommy
The Chthonic Arsenal represents the pre-order bonus package that Frogwares offers across all editions of The Sinking City 2. This arsenal includes three distinct firearms, each with its own attachment compatibility and combat role. Understanding their differences helps you allocate attachments where they provide the most value.
Shale Mary Handgun: Precision and Reliability
The Shale Mary handgun serves as your dependable sidearm throughout the campaign, offering solid damage with manageable recoil. What makes this gun special is its attachment flexibility — it accepts both optics and barrel modifications without significant tradeoffs. Players report that the Shale Mary becomes a headshot machine when paired with a stability grip, allowing for rapid follow-up shots on Deep Ones and Slither enemies.
The handgun's ammo efficiency makes it ideal for conserving scarce resources during exploration segments. When you pair it with the right attachments, this weapon can carry you through entire districts without needing to touch your shotgun or SMG ammunition reserves.
Breakwater Shotgun: Close-Range Devastation
The Breakwater shotgun delivers massive damage at close range but suffers from severe spread and slow reload times. Attachments that tighten the pellet spread transform this weapon from a situational tool into a room-clearing monster. The Kane's Hefty Barrel attachment synergizes particularly well here, pushing damage per pellet high enough to one-shot most standard enemies at point-blank range.
However, the Breakwater demands careful positioning because its effective range remains limited even with attachments—its slug spread widens beyond roughly 15 meters, making distant Innsmouth cultists a risky target. You will want to pair it with a mid-range option for flexibility, which is where the Tektite Tommy fills the gap: its 900-round-per-minute fire rate and 32-round magazine let you suppress advancing Deep One hybrids while closing distance, then swap back to the Breakwater for a devastating point-blank finish.
Tektite Tommy SMG: Suppression and Mobility
The Tektite Tommy SMG excels at sustained fire and mobile combat, though its base damage per bullet runs lower than other options. Attachments that boost stability and reduce spread turn this weapon into a laser at medium range, allowing you to suppress groups of enemies while advancing. The SMG's large magazine capacity means you can maintain pressure without constant reloads, though ammo consumption becomes a genuine concern.
| Weapon | Base Damage | Best Attachment Slot 1 | Best Attachment Slot 2 | Ideal Engagement Range |
|---|---|---|---|---|
| Shale Mary | Medium | Optics | Grip | Medium |
| Breakwater | High | Barrel | Grip | Close |
| Tektite Tommy | Low-Medium | Grip | Magazine | Medium-Close |
Each weapon in the Chthonic Arsenal serves a distinct purpose, and the attachment system amplifies these roles rather than blurring them. A fully modified Shale Mary still cannot match the Breakwater's close-range burst damage, just as the Breakwater cannot compete with the Tektite Tommy's sustained fire capability.
Bucking Bronco Revolver: How to Get the Revolver and Its Attachments
The Bucking Bronco revolver stands apart from the Chthonic Arsenal as a reward for completing the Holloway Manor side quest, which comes exclusively with the Premium Edition of The Sinking City 2. This weapon delivers the highest per-shot damage of any firearm currently available, making it a coveted prize for players who want maximum stopping power.
Unlocking the Holloway Manor Quest
To access the Holloway Manor quest, you must own the Premium Edition of the game, which includes 24-hour advanced access along with this exclusive side content. The quest itself runs approximately two hours and takes place inside a decrepit mansion that has been overtaken by the floodwaters and whatever horrors came with them.
According to the official Steam news announcement for the pre-order campaign, completing the Holloway Manor quest rewards you with the Bucking Bronco revolver, Kane's Hefty Barrel, Kane's Wrapped Grip, and a revolver ammo recipe. This makes the quest doubly valuable because you receive both the weapon and its two signature attachments in a single completion.
Quest Walkthrough and Combat Tips
The Holloway Manor quest tests your combat readiness and puzzle-solving abilities simultaneously. Expect to face several waves of enemies in confined spaces where the Breakwater shotgun shines, followed by environmental puzzles that require careful observation of the mansion's flooded interiors.
-
Prepare before entering — Stock up on medkits and shotgun ammunition before starting the quest, since the mansion interior offers limited loot.
-
Listen for audio cues — The mansion uses sound design to telegraph enemy positions, and players report that audio awareness reduces surprise attacks significantly.
-
Search every room — The quest hides additional resources and lore documents in optional rooms that are easy to miss when rushing toward the objective marker.
-
Save your revolver ammo — The ammo recipe you receive helps, but crafting materials remain limited, so use the revolver for high-priority targets only.
Bucking Bronco Performance and Attachment Synergy
The Bucking Bronco revolver hits harder than any other firearm in the game, with community testing indicating roughly double the per-shot damage of the Shale Mary handgun. This power comes with significant drawbacks: slow reload speed, limited magazine capacity, and substantial recoil that makes rapid follow-up shots difficult.
| Attachment | Effect on Bucking Bronco | Recommended Use Case |
|---|---|---|
| Kane's Hefty Barrel | +Damage, +Recoil | Boss fights, elite enemies |
| Kane's Wrapped Grip | +Stability, +Handling | General combat, crowd control |
| Standard Optics | +Accuracy | Long-range engagement |
The Kane's Hefty Barrel and Kane's Wrapped Grip attachments that come with the quest are specifically tuned for this revolver, and equipping both transforms the Bucking Bronco into a devastating precision instrument. The barrel pushes damage into one-shot territory for most standard enemies, while the grip mitigates the recoil penalty enough to allow controlled follow-up shots.
Attachment Farming and Resource Management
Securing attachments is only half the battle — you also need the resources to install them. Weapon parts and crafting materials are finite during the early campaign, so smart allocation determines how quickly you can fully kit out your preferred loadout.
Where to Find Weapon Parts
Weapon parts drop from elite enemies, appear in supply caches, and reward completion of optional investigations. The hidden weapons guide details several locations where unique weapons and their associated parts can be discovered, though these routes often require venturing into dangerous territory.
-
Elite enemy drops — The Slither variants and armored Deep Ones consistently drop weapon parts, making them worthwhile farming targets.
-
Supply caches — Locked containers scattered across districts contain weapon parts, though many require safe combinations to open. The safe combinations guide provides the codes for these caches.
-
Optional investigation rewards — Several side cases reward weapon parts upon completion, offering a reliable source that does not require combat.
Prioritizing Your Attachment Installations
Given the scarcity of weapon parts, you cannot afford to install every attachment you find. Prioritize based on your playstyle and the enemies you face most frequently: for instance, if you are funneling resources into the Chthonic Arsenal to upgrade the Bucking Bronco revolver, skip the stability stock for the Breakwater shotgun and instead reserve those parts for the high-caliber rounds that boost the Bronco’s damage against Deep Ones. Conversely, if you rely on the Tektite Tommy SMG for close-quarters firefights, prioritize the extended magazine over the Shale Mary handgun’s silencer, as the ammo capacity directly counters the swarm tactics of the Innsmouth raiders. Since parts are non-refundable once installed, a misallocated upgrade can cripple your mid-game loadout, so weigh each attachment against the specific enemy encounter rates in your current chapter.
-
Install damage-boosting barrels first — Higher damage reduces the number of shots needed to kill, which conserves ammunition and reduces exposure time.
-
Add stability grips second — Improved stability means more shots land on target, which effectively increases your damage output without consuming additional ammo.
-
Consider magazine upgrades only for SMGs — The Tektite Tommy benefits most from increased capacity, while the Shale Mary and Breakwater gain less from this attachment type.
-
Skip optics unless sniping — The close-to-medium engagement ranges in most districts make optics a lower priority than damage or stability improvements.
The weapons guide offers a comprehensive breakdown of all firearms and their optimal attachment configurations, which helps you plan your resource expenditure before committing weapon parts. Since the Tektite Tommy SMG and Breakwater shotgun compete for the same high-tier stabilizer components, the guide’s priority rankings let you see exactly which weapon benefits most from a recoil-reduction investment early on—saving you from wasting scarce Chthonic Arsenal salvage on a marginal upgrade for the Bucking Bronco revolver, whose iron sights already provide adequate accuracy at close range.
Advanced Attachment Strategies for Late-Game Combat
Once you have secured the Bucking Bronco and fully modified your Chthonic Arsenal weapons, you can begin experimenting with more advanced attachment combinations that exploit enemy weaknesses and environmental advantages. For instance, pairing the Tektite Tommy’s high fire-rate with a Hydro-Jacketed Rounds mod transforms it into a crowd-control tool that melts the Drowned Horde’s clustered formations, while the Breakwater shotgun benefits more from a Choke and Slug conversion to punch through the armored plating of Brutes at medium range—a setup that sacrifices spread for precision, but only becomes viable once you’ve unlocked the late-tier Chthonic Arsenal upgrade that reduces reload penalties, making the trade-off sustainable in sustained firefights.
Elemental and Situational Considerations
While The Sinking City 2 does not feature elemental damage types, certain enemies have resistances and weaknesses that attachment choices can exploit. Community reports indicate that the Breakwater shotgun's pellet spread interacts with enemy weak points differently than the Shale Mary's precise shots, which means your attachment loadout should shift based on the enemy composition of each district.
| Enemy Type | Recommended Weapon | Key Attachment | Why It Works |
|---|---|---|---|
| Deep Ones | Breakwater | Barrel Mod | One-shot potential at close range |
| Slither | Shale Mary | Grip Mod | Rapid follow-up shots on weak points |
| Shadows | Tektite Tommy | Magazine Mod | Sustained fire during space-bending attacks |
| Bosses | Bucking Bronco | Hefty Barrel | Maximum per-shot damage |
Stamina and Movement Considerations
Heavier attachments reduce movement speed and increase stamina consumption during combat maneuvers. The Kane's Hefty Barrel adds significant weight, which can make dodging more difficult against fast enemies like the Slither. Players who prioritize mobility should consider whether the damage increase justifies the handling penalty, especially in boss encounters where positioning matters more than raw output.
The melee combat system offers an alternative when your modified weapons feel too heavy for extended engagements. The melee weapons guide explains how to incorporate melee attacks into your combat rotation, which can preserve ammunition and reduce the stamina penalty from heavy attachment loadouts.
Frequently Asked Questions
What are the best The Sinking City 2 weapon attachments for each gun?
The Kane's Hefty Barrel and Kane's Wrapped Grip are the strongest attachments currently available, and they pair perfectly with the Bucking Bronco revolver. For the Shale Mary handgun, prioritize stability grips and optics. The Breakwater shotgun benefits most from barrel modifications that tighten spread, while the Tektite Tommy SMG gains the most from magazine upgrades and stability grips.
How do I get the Bucking Bronco revolver in The Sinking City 2?
The Bucking Bronco revolver requires the Premium Edition of The Sinking City 2, which includes the Holloway Manor side quest. Complete this two-hour quest to receive the revolver, Kane's Hefty Barrel, Kane's Wrapped Grip, and a revolver ammo recipe. The quest takes place inside a flooded mansion and tests both combat and puzzle-solving abilities.
Do weapon attachments carry over to New Game Plus?
Yes, weapon attachments and installed modifications carry over to New Game Plus runs, according to community testing. This makes attachment investment worthwhile even late in your first playthrough, since the upgrades persist into subsequent runs. However, weapon parts themselves do not carry over, so spend them before starting a new cycle.
Can I remove attachments after installing them?
Currently, attachments cannot be removed once installed, which means you should carefully consider your choices before committing weapon parts. Community reports suggest that Frogwares may add a removal mechanic in a future patch, but as of now, installation is permanent. Plan your attachment loadout based on your long-term weapon preferences.
Are the Chthonic Arsenal weapons better than standard variants?
The Chthonic Arsenal weapons feature unique visual designs and slightly different handling characteristics compared to standard variants, though base damage stats remain similar. The main advantage comes from attachment compatibility, with some mods providing enhanced effects on these pre-order weapons. Players who did not pre-order can still find standard versions throughout the campaign.